Rest Api
Currently icehrm expose employee details and attendance data via the REST api.
Full Api Documentation can be found here: https://icehrm.docs.apiary.io/#
Setting up IceHrm Open Source and Pro REST Api - Nginx
IceHrm includes a REST api but it needs to be configured via web server configurations.
Basically all the requests coming to icehrm.url/app/api/ should be redirected to icehrm.url/app/index.php
For an example if you are using Nginx web server you need to add following location block inside your sever block in Nginx config file for your site
location /app/api/ {
    try_files $uri /app/api/index.php?/$uri&$args;
}
If IceHrm is not loaded from web root, for an example if your icehrm url is your-icehrm-url.com/icehrm instead of your-icehrm-url.com you should add any directory in relative path to location block as in following example
location /icehrm/app/api/ {
    try_files $uri /icehrm/app/api/index.php?/$uri&$args;
}
Setting up IceHrm Open Source and Pro REST Api - Apache (XAMPP, WAMPP)
For apache web server we have already included a .htaccess file under icehrm/app/api. This will redirect api request properly
Testing Rest Api
- First you should enable REST api via Settings -> Other -> Enable REST Api setting
- Visit
your-icehrm-url.com/app/api/echo - This should output an echo with a random number
Using REST Api with Open Source and IceHrmPro
Your api url base will be http://your-icehrm-url.com/app/api.
If you want to call employees/me, you should send a request to http://your-icehrm-url.com/app/api/employees/me.
Using REST Api with Cloud installations
First you should enable REST api via Settings -> Other -> Enable REST Api setting.
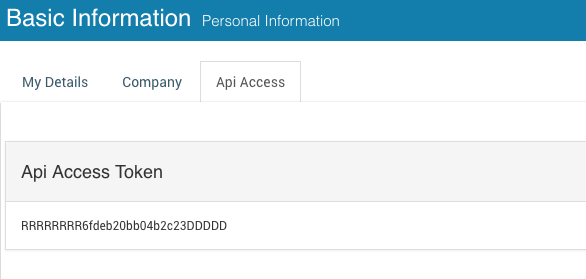
IceHrm uses OAuth 2.0 bearer authentication. So you have to send the bearer token with every request. Each icehrm user can find their auth token by opening Basic Information -> Personal Information -> Api Access (tab).

Making First Api call - Cloud
If your icehrm instance name is test1 (https://test1.icehrm.com), your Api url will be
Then according to https://icehrm.docs.apiary.io/# you can view own data by sending a GET request to
You can use following request by changing api url and auth token
curl -i https://icehrm.com/api/test1/employees/me \
  -H "Authorization: Bearer RRRRRRRR6fdeb20bb04b2c23DDDDD"
For creating a employee you can use
curl -X POST -H "Authorization: Bearer 9RRRRRRRR6fdeb20bb04b2c23DDDDD" -H "Content-Type: application/json" -d '{
  "employee_id": "D101",
  "first_name": "IceHrm 123",
  "middle_name": "Sample Ex1",
  "last_name": "Employee",
  "nationality": "35",
  "birthday": "1984-03-17",
  "gender": "Male",
  "marital_status": "Married",
  "ssn_num": "",
  "nic_num": "294-38-3535",
  "other_id": "294-38-3535",
  "driving_license": "",
  "employment_status": "3",
  "job_title": "11",
  "pay_grade": "2",
  "work_station_id": "",
  "address1": "2772 Flynn Street",
  "address2": "Willoughby",
  "city": "Willoughby",
  "country": "US",
  "province": "41",
  "postal_code": "44094",
  "home_phone": "440-953-4578",
  "mobile_phone": "440-953-4578",
  "work_phone": "440-953-4578",
  "work_email": "[email protected]",
  "private_email": "[email protected]",
  "joined_date": "2005-08-03",
  "confirmation_date": "0000-00-00",
  "supervisor": "1",
  "indirect_supervisors": "[\"3\",\"4\"]",
  "department": "1",
  "termination_date": "0000-00-00",
  "status": "Active",
  "approver1": "5",
  "approver2": "6",
  "approver3": "7"
}' "https://icehrm.com/api/test1/employees"